


.jpg)
Featured Products
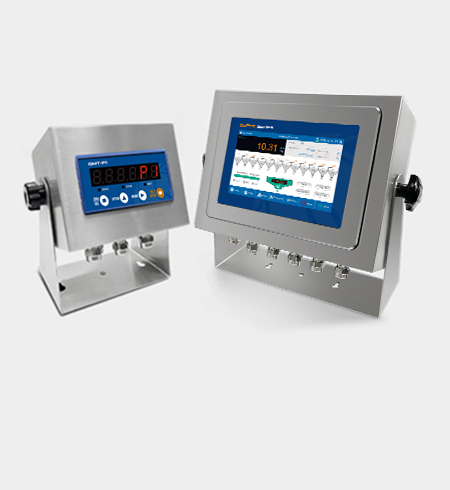
Weighing indicators

Checkweighers

Bagging Scales
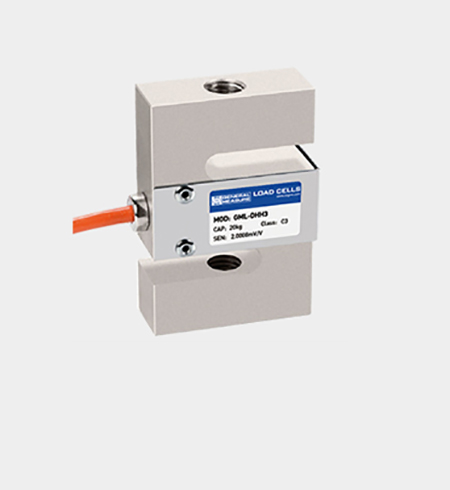
Load Cells
Typically, the configurator is accessible via the Windows Start Menu under: Volvo > Premium Tech Tool > Tools > VOCOM Configurator . Note: Some versions call it "Vocom 1 Settings."
While there is no standalone software explicitly named "Vocom 1 Configurator", the is configured directly through the Volvo Premium Tech Tool (PTT) settings menu . How to Configure Vocom I
Before the configurator works, the "Vehicle Interface" driver must be installed. Navigate to your PTT installation folder (usually C:\Program Files (x86)\Volvo\PTT\Drivers ).
: When configuring or updating firmware, ensure the vehicle or external power supply provides a steady 12V–24V to prevent bricking the unit.
While the VOCOM 1 is the older predecessor to the VOCOM 2, it remains widely used for: Volvo Trucks (Older and mid-range generations). Volvo Construction Equipment Mack Trucks Renault Trucks using this tool?
A unique identifier (typically starting with 8889...) critical for registration and tracking.
Connect the USB cable to a high-power USB port on your PC (avoid unpowered USB hubs).
This is the most common error. First, swap the USB cable; the Vocom 1 uses a specialized, ruggedized USB port that can sometimes loose pins. Next, check the Windows to ensure the Vocom shows up under "Network Adapters" or "Universal Serial Bus controllers" without a yellow exclamation mark. Firmware Mismatch
While Wi-Fi is convenient for reading codes outside the cab, never flash an ECU wirelessly. A momentary drop in signal can permanently ruin a customer's engine control module.
View serial numbers and hardware versions to ensure authenticity. Step-by-Step: Setting Up the Vocom 1 1. Driver Installation
The (specifically for the 88890300 interface) is a critical utility tool used to manage and set up the communication link between a diagnostic laptop and a vehicle's Electronic Control Units (ECUs).
Input your SSID and security credentials. Vocom 1 typically supports 2.4GHz bands; ensure your router isn't locked strictly to 5GHz. Troubleshooting Common Issues "Communication Unit Not Found"
Always connect a battery charger to the vehicle to maintain voltage above 12.5V , as the configurator may flag low-voltage errors that interrupt communication.
Ensure your laptop is plugged into a wall outlet to prevent a mid-update shutdown. Launch the .
The Vocom 1 Configurator is rarely installed as a standalone application. Instead, it is bundled with the Vocom driver package or the main Premium Tech Tool (PTT) installation. Disconnect the Vocom 1 adapter from your PC. Run the PTT or Vocom Driver installer executable file.
If an update is available, a prompt will appear automatically.
_Manual_Batching_Mode.jpg)
Typically, the configurator is accessible via the Windows Start Menu under: Volvo > Premium Tech Tool > Tools > VOCOM Configurator . Note: Some versions call it "Vocom 1 Settings."
While there is no standalone software explicitly named "Vocom 1 Configurator", the is configured directly through the Volvo Premium Tech Tool (PTT) settings menu . How to Configure Vocom I
Before the configurator works, the "Vehicle Interface" driver must be installed. Navigate to your PTT installation folder (usually C:\Program Files (x86)\Volvo\PTT\Drivers ).
: When configuring or updating firmware, ensure the vehicle or external power supply provides a steady 12V–24V to prevent bricking the unit.
While the VOCOM 1 is the older predecessor to the VOCOM 2, it remains widely used for: Volvo Trucks (Older and mid-range generations). Volvo Construction Equipment Mack Trucks Renault Trucks using this tool?
A unique identifier (typically starting with 8889...) critical for registration and tracking.
Connect the USB cable to a high-power USB port on your PC (avoid unpowered USB hubs).
This is the most common error. First, swap the USB cable; the Vocom 1 uses a specialized, ruggedized USB port that can sometimes loose pins. Next, check the Windows to ensure the Vocom shows up under "Network Adapters" or "Universal Serial Bus controllers" without a yellow exclamation mark. Firmware Mismatch
While Wi-Fi is convenient for reading codes outside the cab, never flash an ECU wirelessly. A momentary drop in signal can permanently ruin a customer's engine control module.
View serial numbers and hardware versions to ensure authenticity. Step-by-Step: Setting Up the Vocom 1 1. Driver Installation
The (specifically for the 88890300 interface) is a critical utility tool used to manage and set up the communication link between a diagnostic laptop and a vehicle's Electronic Control Units (ECUs).
Input your SSID and security credentials. Vocom 1 typically supports 2.4GHz bands; ensure your router isn't locked strictly to 5GHz. Troubleshooting Common Issues "Communication Unit Not Found"
Always connect a battery charger to the vehicle to maintain voltage above 12.5V , as the configurator may flag low-voltage errors that interrupt communication.
Ensure your laptop is plugged into a wall outlet to prevent a mid-update shutdown. Launch the .
The Vocom 1 Configurator is rarely installed as a standalone application. Instead, it is bundled with the Vocom driver package or the main Premium Tech Tool (PTT) installation. Disconnect the Vocom 1 adapter from your PC. Run the PTT or Vocom Driver installer executable file.
If an update is available, a prompt will appear automatically.